As many people have discussed on the web and YouTube, I have also had a problem with the liftgate on my Toyoto Sequoia. Often people report the plastic lever on the release handle fails and they have to replace the handle. A few more have problems with the cable and/or the latch itself. I’ll not repeat the wisdom from the other postings on replacement of these parts.
I spent a long time trying to figure out why new replacement parts were not solving my problems. The root cause of my repair problems were DEFECTIVE OR POORLY EXECUTED REPLACEMENT PARTS. With that in mind, I’m going to try to document some “acceptance” criteria to qualify replacement parts. This should help you decide if you should accept the replacement parts you have and whether you want to place them in your car and have headaches trying to get things to work.
The Latch
When getting a new replacement latch, test it to verify that it works properly.
- Manually exercise the latch before you place it into the car. It should move freely and have a nice clean “thump” when it opens and close. If it seems stiff or there seems to be metal-on-metal when you open it, it is likely this part is going to be hard to open and therefore put stress on the opening handle — and maybe breaking it. REJECT THIS PART. (See comment below the advertised “all metal” handles)
- The latch must open smoothly, easily with minimal throw by the cable and thus the opening handle. I had purchased a latch which gave me problems. I’ll not waste my time discussing how I worked on this and couldn’t get it to work. After lubricating and fiddling with it for a long while, I finally gave up and purchased a much more expensive latch (Dorman brand). The DORMAN latch was significantly, amazingly much smoother and required nearly half the pull distance by the cable. I found significant differences between the bad latch and the good DORMAN lotch. Look for these characteristics:
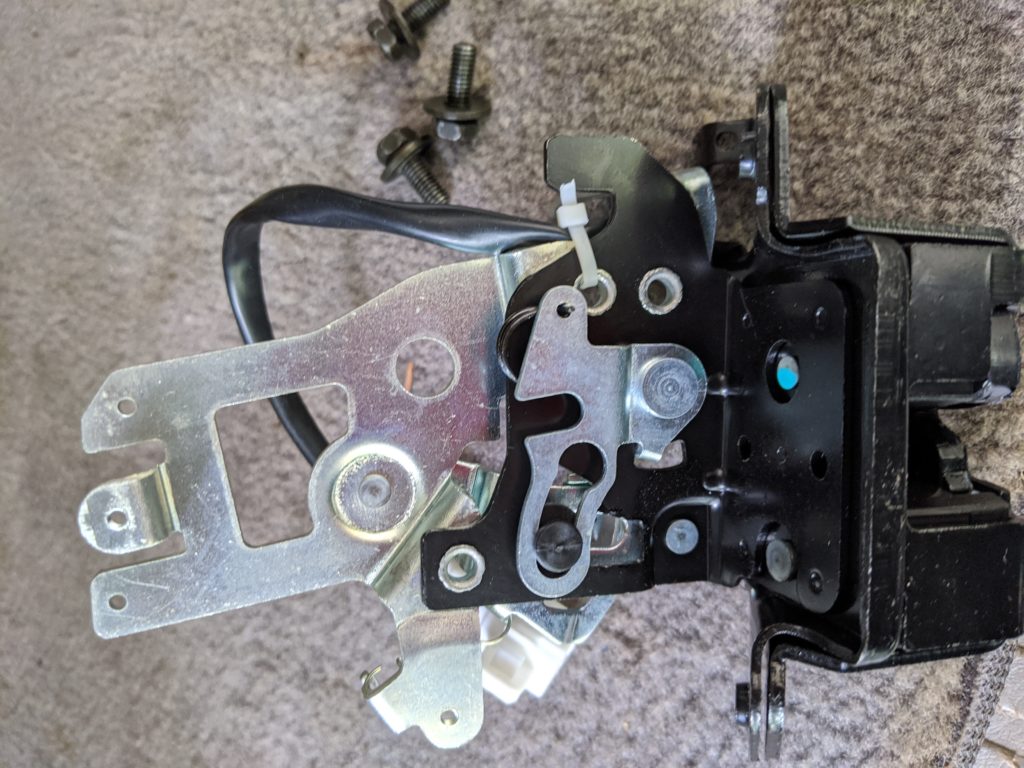
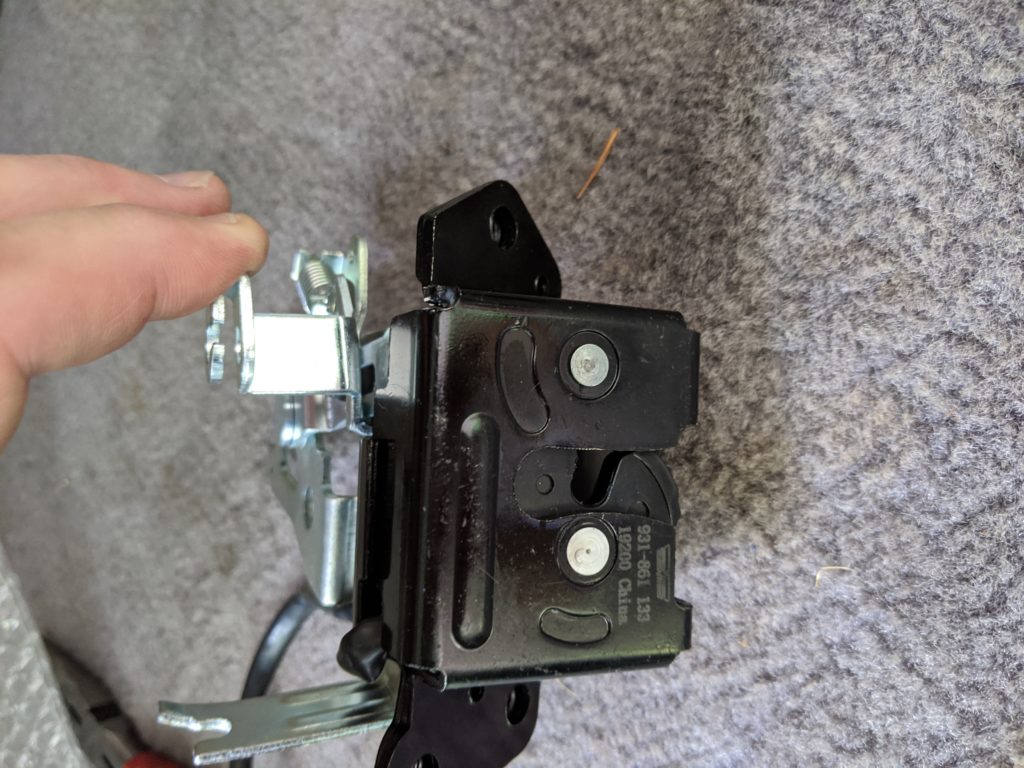
- Note the channel where the black plastic peg is located. In the relaxed position, this channel is clear — the black peg can move easily up and down the channel. See photo — my ring finger is under the black peg.. This peg moves down the channel — to the left in the photo — when the gate is locked. In this position the latch will not open. So the peg must have clearance to move freely right and left in this channel. As in the photo, the top lever has the cable connected and the cable pulls that lever toward the top. This moves the black peg so as to move the underlying lever that extends into the latch’s black box. That underlying lever is shown just to the right of my thumb, under the topmost cable attach lever, and reaches into the latch box just under my thumb. It is what releases the latch inside the box.
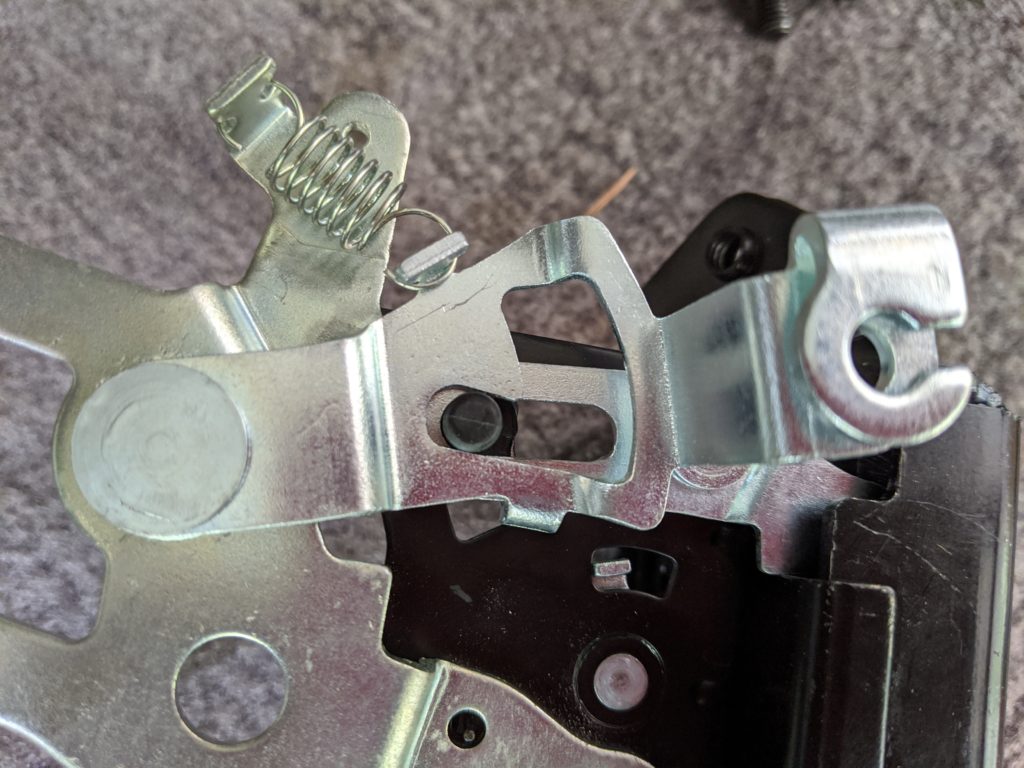
- Place a screwdriver into the bottom of the latch. Move the latch to the closed position as shown in the following picture.
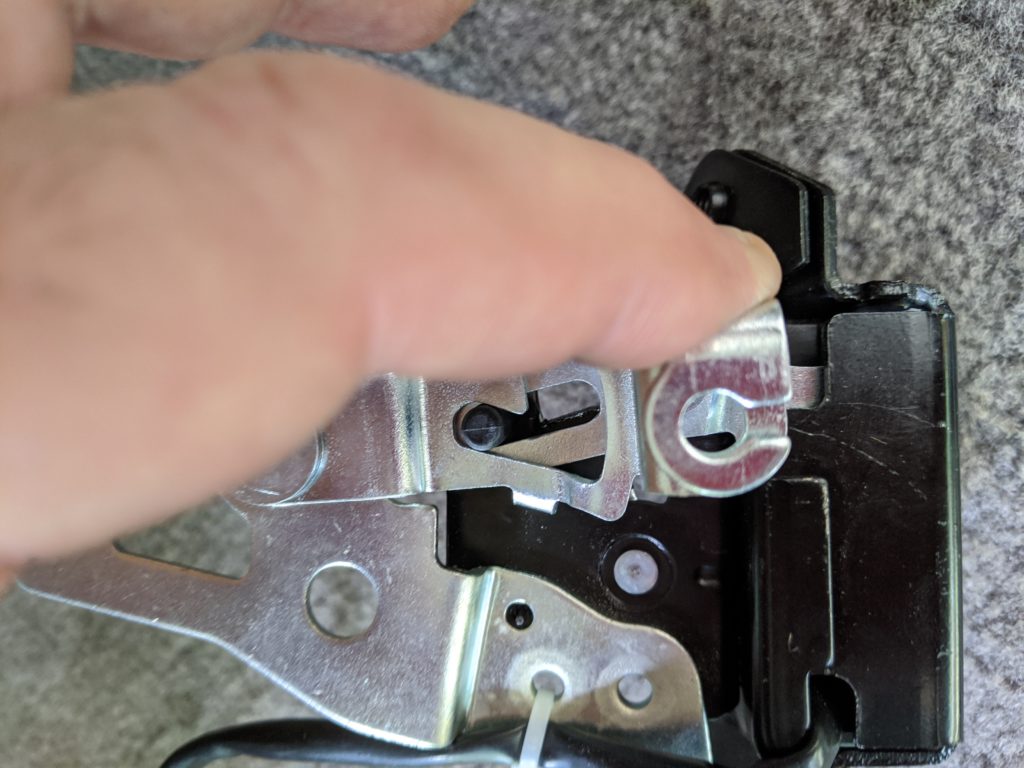
 In the photo, note where my finger is. This is where the cable will pull the release mechanism. In the next examination step, you will move the release lever to the left — just like the cable will pull the release. With the latch in the closed position, slowly push the lever to the left and note exactly when the latch releases.
 - If the release occurs only when the lever is moved up against the stop, THIS LATCH IS UNACCEPTABLE. The length of the pull is too long. The release handle cannot provide this pull length.
- The following picture shows the point where the latch releases on a good latch. It releases before the latch reaches the metal-to-metal stop. Note that the lever moves roughly half-way across the maximum travel. Note the position of the cable barrel holder — where my finger is sitting. THIS LATCH IS ACCEPTABLE. If it releases further to the left, this is not good.
- Note the channel where the black plastic peg is located. In the relaxed position, this channel is clear — the black peg can move easily up and down the channel. See photo — my ring finger is under the black peg.. This peg moves down the channel — to the left in the photo — when the gate is locked. In this position the latch will not open. So the peg must have clearance to move freely right and left in this channel. As in the photo, the top lever has the cable connected and the cable pulls that lever toward the top. This moves the black peg so as to move the underlying lever that extends into the latch’s black box. That underlying lever is shown just to the right of my thumb, under the topmost cable attach lever, and reaches into the latch box just under my thumb. It is what releases the latch inside the box.
- Check the cable by itself. It should move freely. To test, make a coil so that it looks like __O__ with a cable end on the left, end on the right with a single loop in the center. It should — must — move easily within this coil.
- Next connect the ball-end of the cable into the release handle. If the handle is still in the door, simply let the other end of the cable dangle down. Pull the pin on the latch end of the cable back and forth — exercise the cable and the release handle. It should move smoothly along with the handle.
- Pull the cable so the handle is in it’s full closed position. Then put the cable pin into the latch and push the conduit cap into the retention notch on the latch. Verify that the release handle is in the closed position. Examine the latch. It should be in the relaxed position. If the cable is pulling the latch, put a crescent wrench on the retention notch bracket and gently, slowly adjust. The cable should not be loose but likewise it should not pull the latch. After adjustment, exercise the release handle by putting a screwdriver into the latch and closing it, and then opening the latch. Adjust the bracket. IF THIS DOES NOT OPERATE SMOOTHLY, THE PARTS ARE NOT ACCEPTABLE — either the latch or the release handle.
The Release Handle
I had purchased a “full metal” release handle. I found it to be very, very stiff with metal-on-metal grind. Not usable in my opinion.
I also have a couple of release handles and have found a great variation in how they are built. It seems that how the parts are bent makes a big difference in smooth operation and extent of the cable pull. At this point, my suggestion is to work with it on the bench with the latch until things work smoothly.
Misc Photos
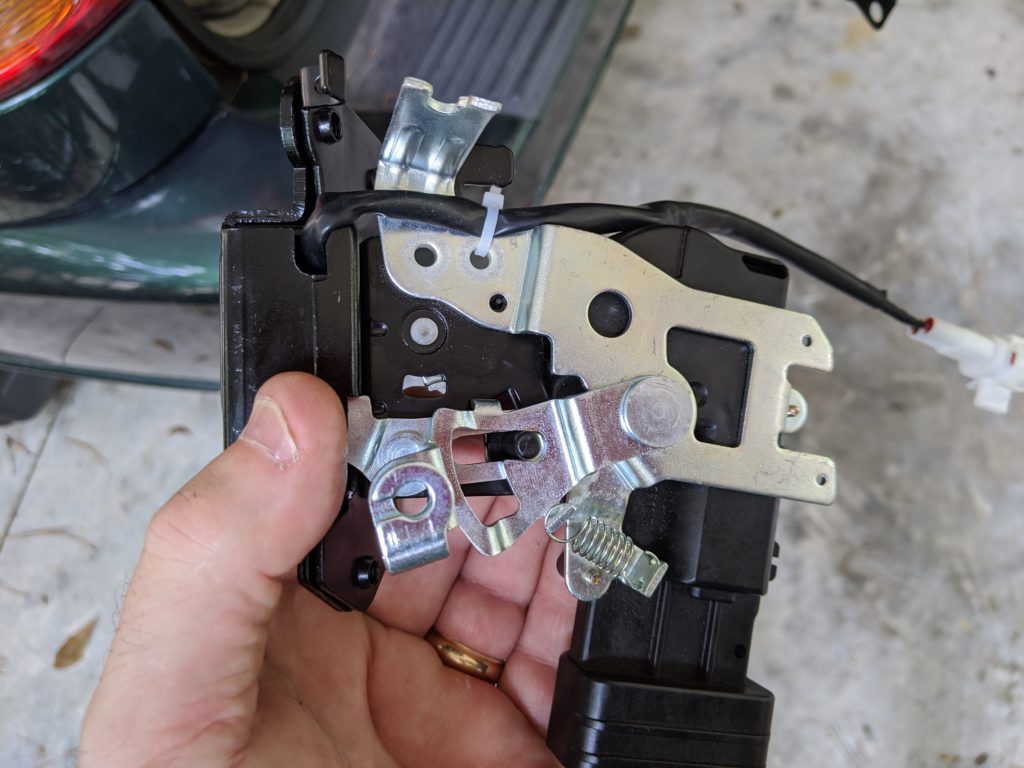
The following picture shows the latch that I found worked. It is shown in the closed position and has the DORMAN logo and part number. I ordered from RockAuto and they indicate that this part from Dorman has a lifetime warranty. I’ve seen parts advertised with the 931-861 part number. They show the part number on the part but many are without the Dorman logo. I wonder…. But I can vouch for the Dorman part working just dandy for me.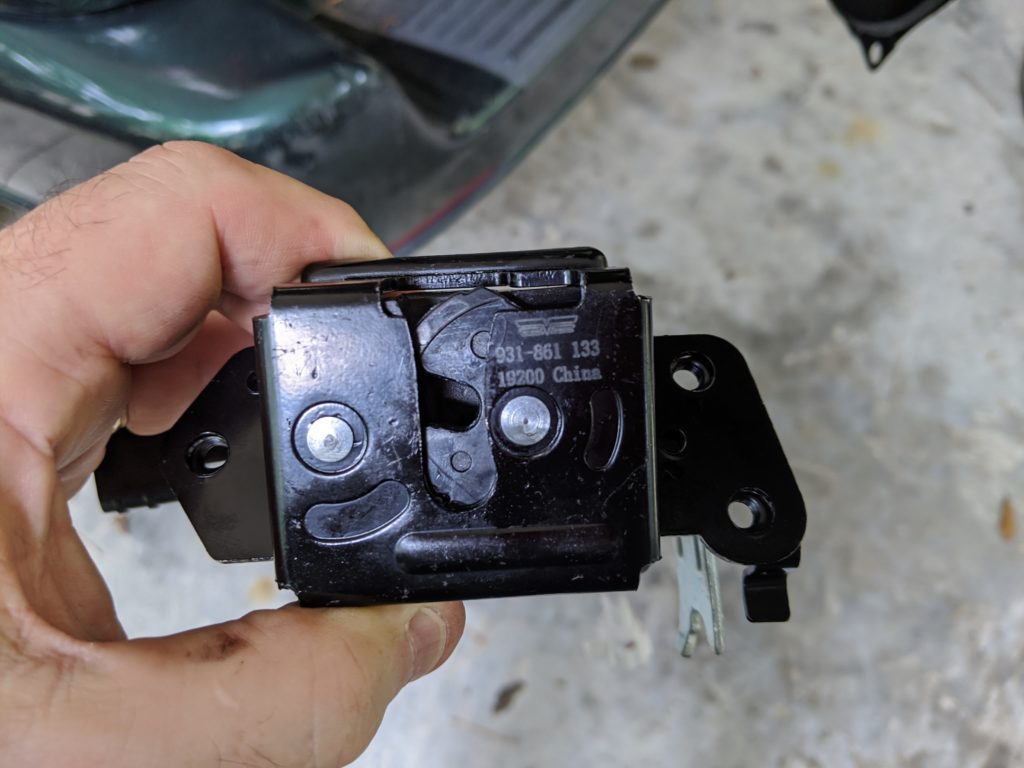
The next photo shows the back side of the latch — without the lock solenoid attached. The lock solenoid fits into the vertical slot shown near the center of the photo.